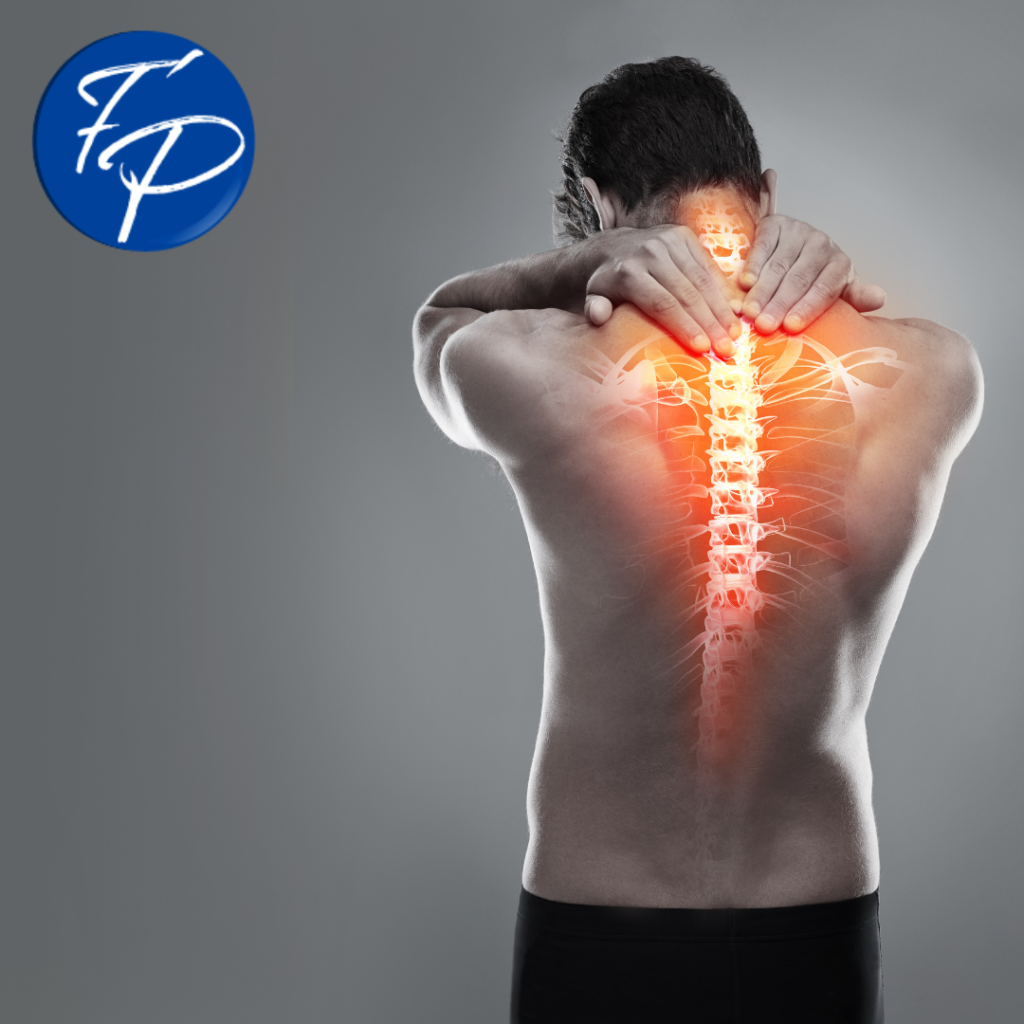
Mid back pain is common, affecting 15% of the population (1). It’s pesky and hard to reach. And it crops up at the most inconvenient times.
In this article you’ll learn 15 key exercises to treat middle back pain.
Anatomy
The thoracic spine (blue) has 12 vertebrae with a corresponding rib (yellow) on each side.
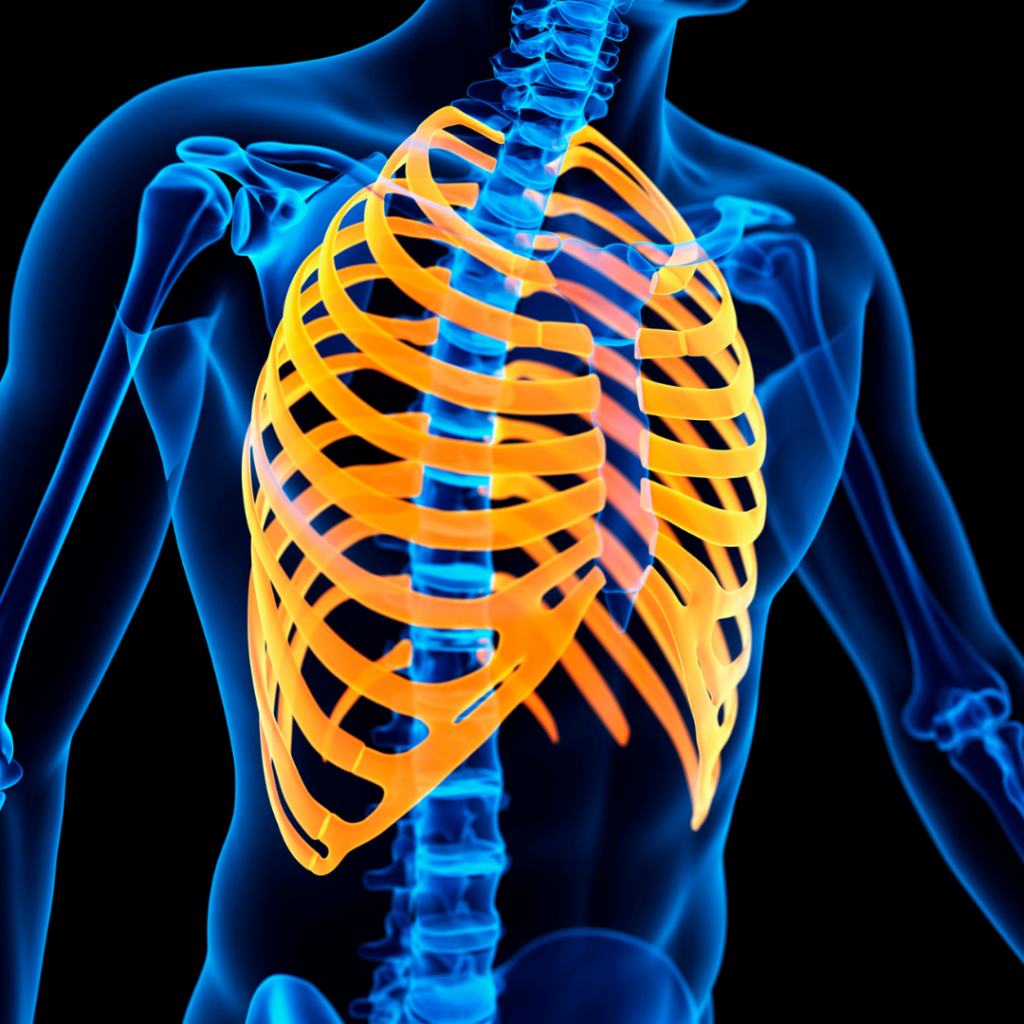
The rib cage increases the stiffness of this region of the spine–the thoracic spine is less mobile than the neck and the low back. Several muscles sit on top of the rib cage. Tight spots in these muscles create pain between the shoulder blades.
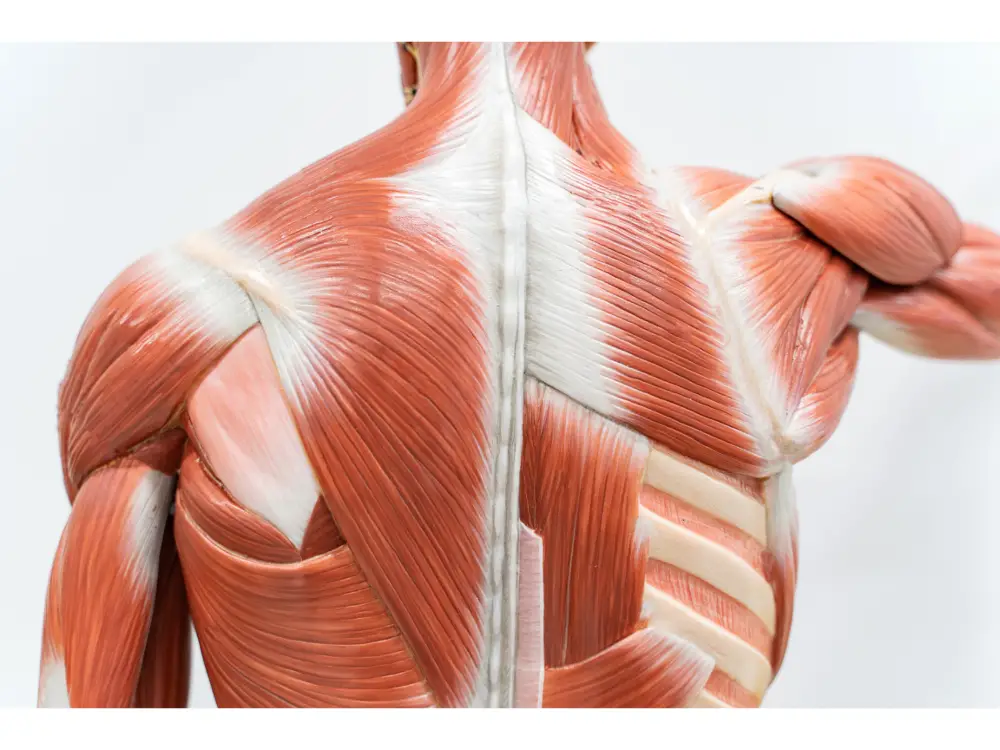
I’ll show you how to treat these tight muscles in a bit–keep an eye out for “Rhomboid Release” in the treatment section.
Red Flags
Mid back pain comes from many sources. We’ll cover the rare but serious causes first. As the term suggests, red flags indicate a serious health problem might be present.
Vital organs are notorious for referring pain to the chest, middle back and upper back. In these rare cases, pain around the thoracic spine indicates a serious medical issue.
These conditions warrant further medical treatment and can’t be treated with physical therapy, chiropractic care or exercise.
This isn’t an exhaustive list, but these “red flag” symptoms indicate more serious medical issues:
Pain Worsens with Exertion
Decreased blood flow to the heart (stable angina) can cause upper back or chest pain that worsens with exertion. For example, pain intensifies when you’re chasing your dog as it sprints towards a squirrel.

But it gets better when you’re sitting and eating a warm bowl of squirrel stew.
Pulsing and Throbbing Symptoms
Chest and back pain with a pulsing or throbbing quality can indicate artery issues. If in doubt, go see a qualified medical professional.
Pain Changes after Eating
Stomach ulcers can send pain to the mid back area.

Prolonged use of NSAIDs (e.g. ibuprofen) increases the risk of developing an ulcer. Pain that changes after meals may indicate the presence of a stomach ulcer.
Pain After Big Meals
An inflamed gallbladder (cholecystitis) can cause pain in the upper back and right shoulder blade (2). It can be accompanied by fever, nausea and vomiting. Symptoms worsen after a large, fatty meal since the gallbladder breaks down fat in the digestive tract.

I love a 5-scoop banana boat sundae as much as the next guy, but it shouldn’t cause upper back pain.
Other Red Flags
- Fever
- Nausea
- Vomiting
- Bilateral arm or leg symptoms
- Traumatic injury
- Changes in bowel or bladder function
- Difficulty walking
On the other hand, musculoskeletal thoracic spine pain responds well to physical therapy treatment. It’s usually reproducible and related to specific positions, activities and movements.
If you’re concerned your symptoms seem like a serious medical problem, please consult with your physician or physical therapist.

Physical therapists are well-trained to screen for medical problems and identify when patients need further medical attention (3).
Now the scary stuff is behind us, let’s talk about treatments that work for most cases of mid back pain.
Physical Therapy Exercises
Mid back pain is often due to stiffness or weakness. Someone with stiffness might have trouble performing overhead or twisting activities, like playing tennis or golf.
Pain related to weakness can intensify with prolonged stooped postures, standing in one place or sitting with poor posture. Effective treatments involve mobilizing and strengthening the mid-back.
We’ll cover 6 mobility exercises and 9 strength exercises for the middle back.
Mobility Exercises
The following exercises improve motion at the rib cage and thoracic spine–they’re great for treating pain related to stiffness.
1) Lower Trunk Rotations
These gentle exercises can be performed on the bed or the floor. They’re a feel-good exercise to get the low back and mid back rotating better.
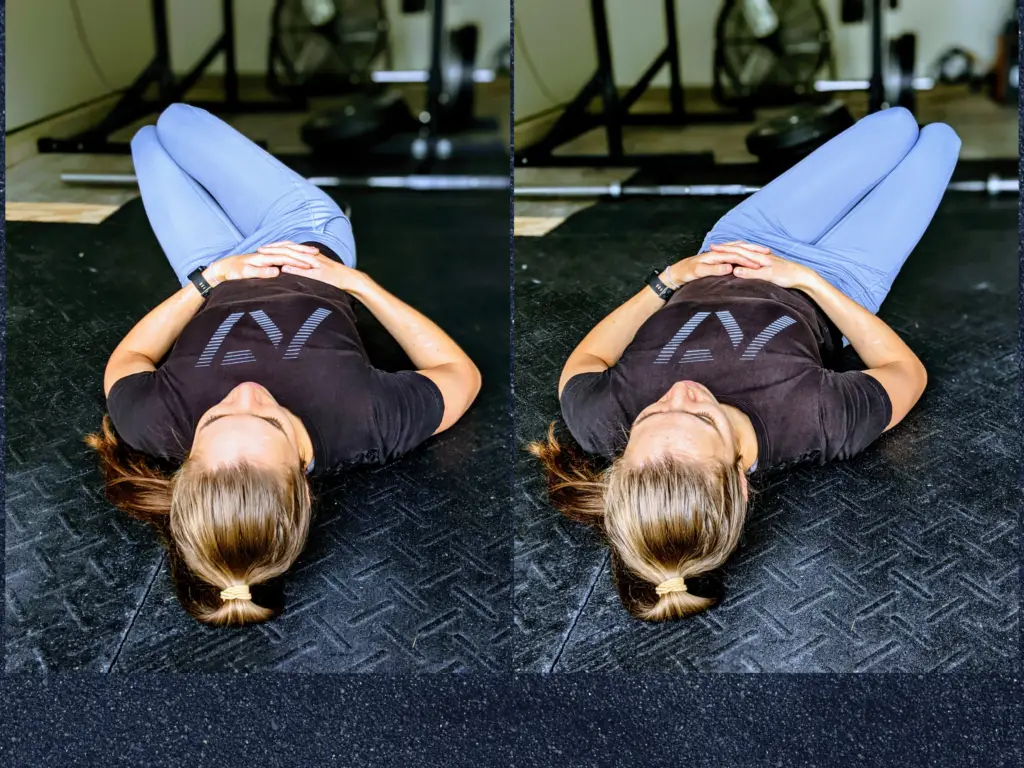
Slowly move the knees back and forth, stretching a little further each time. I discourage patients from pushing through pain with this exercise. You should feel a slight stretch on the first few repetitions, working into a good stretch on the last couple reps.
2) Cat-Cow Pose
This simple exercise is a superb way to loosen a stiff and achy upper back.
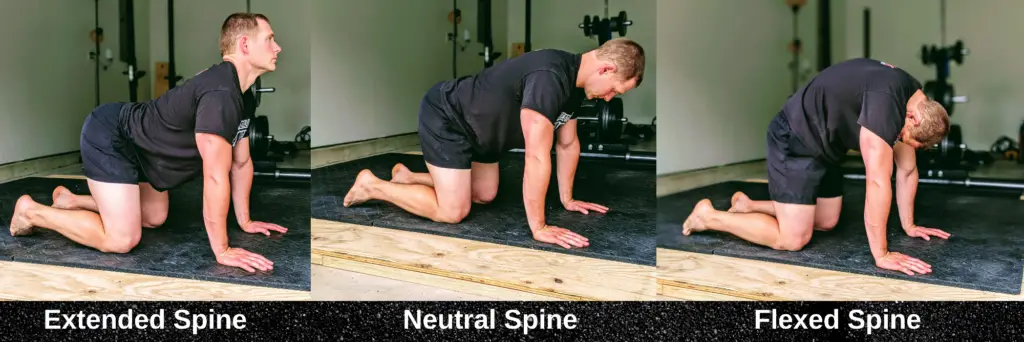
First, start with your spine in a neutral position. Next, look up and extend your spine. Then, arch your back up and bring the chin to the chest. Move in a slow, controlled fashion.
3) Open Book Exercise
This exercise improves rotation mobility throughout the spine–at the neck, mid back and lower back.
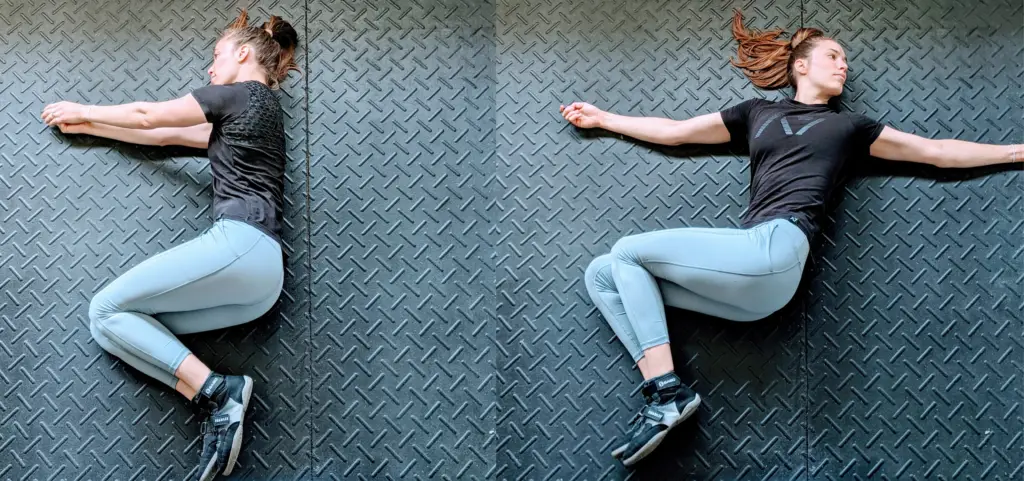
Start lying on your right side with your arms straight, hands together. Then, turn and reach your left hand behind you as you rotate your upper body to the left. Look left to increase the stretch.
Keep the right hand on the floor, or use it to hold the left knee down. Take a deep breath or two as you hold the stretch–breathing expands and contracts the ribs, which will get your rib cage moving better. Repeat on the other side.
4) Thread the Needle
This is a great exercise to loosen tight muscles and get the rib cage and middle back twisting well.
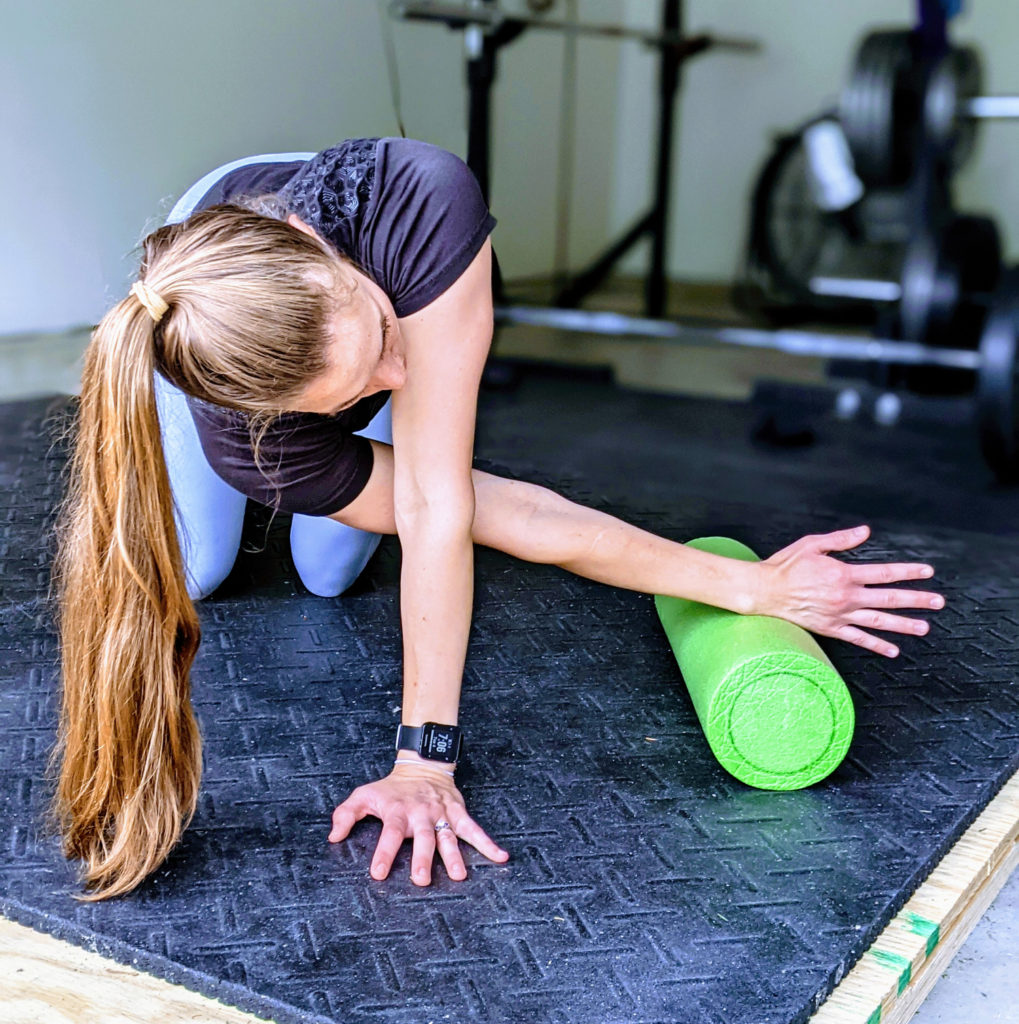
The starting position is on hands and knees. Reach under your torso and slowly slide the arm away from you. You should feel a great stretch across the upper back. You can do this without any equipment, but using a foam roller enhances the mobilization.
5) Foam Roller Thoracic Extensions
Over 70% of patients with thoracic spine pain benefit from repeated extensions (4). Modern life puts us in a flexed position–sitting at a desk, driving in a car, working on our computers, phones, and tablets.
Loosening up the back is often as simple as stretching the spine in the opposite direction. This exercise helps you do just that–it’s a clutch option after a long day at the office.
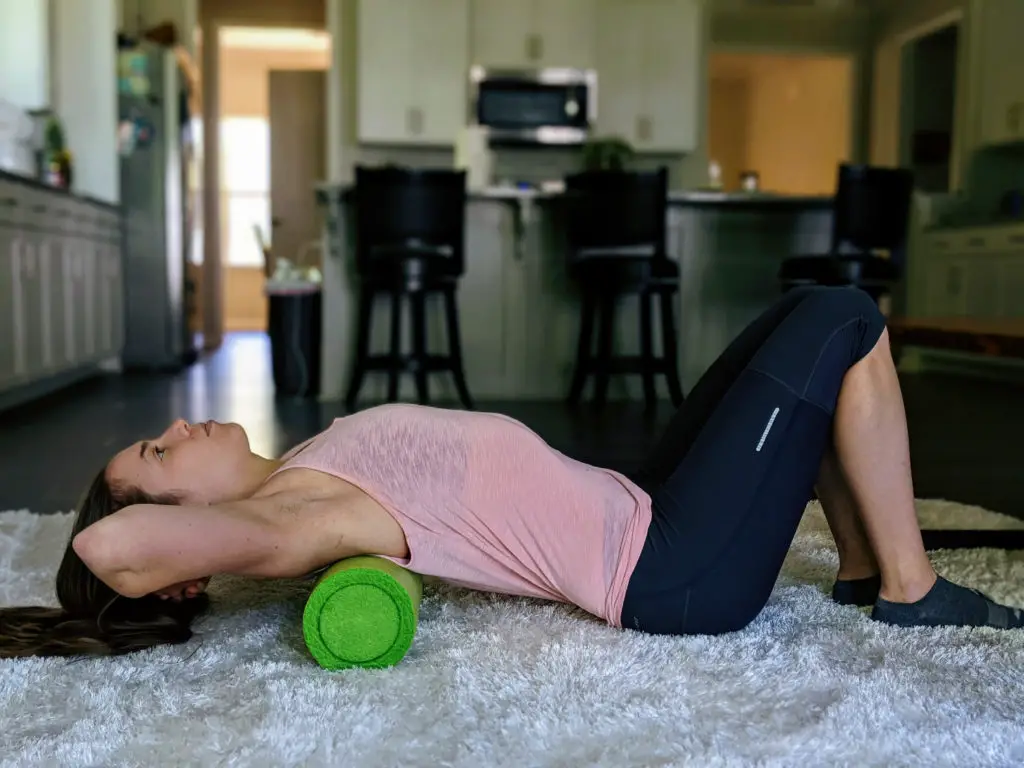
Keep the hips on the ground as you bend backwards over the foam roller. You should feel a gentle stretch in the upper back. Knobby foam rollers don’t feel great for this exercise. Need a foam roller? Grab one here.
6) Rhomboid Release
Last but not least, this technique treats tight spots in the upper back muscles, called trigger points, which contribute to pain.
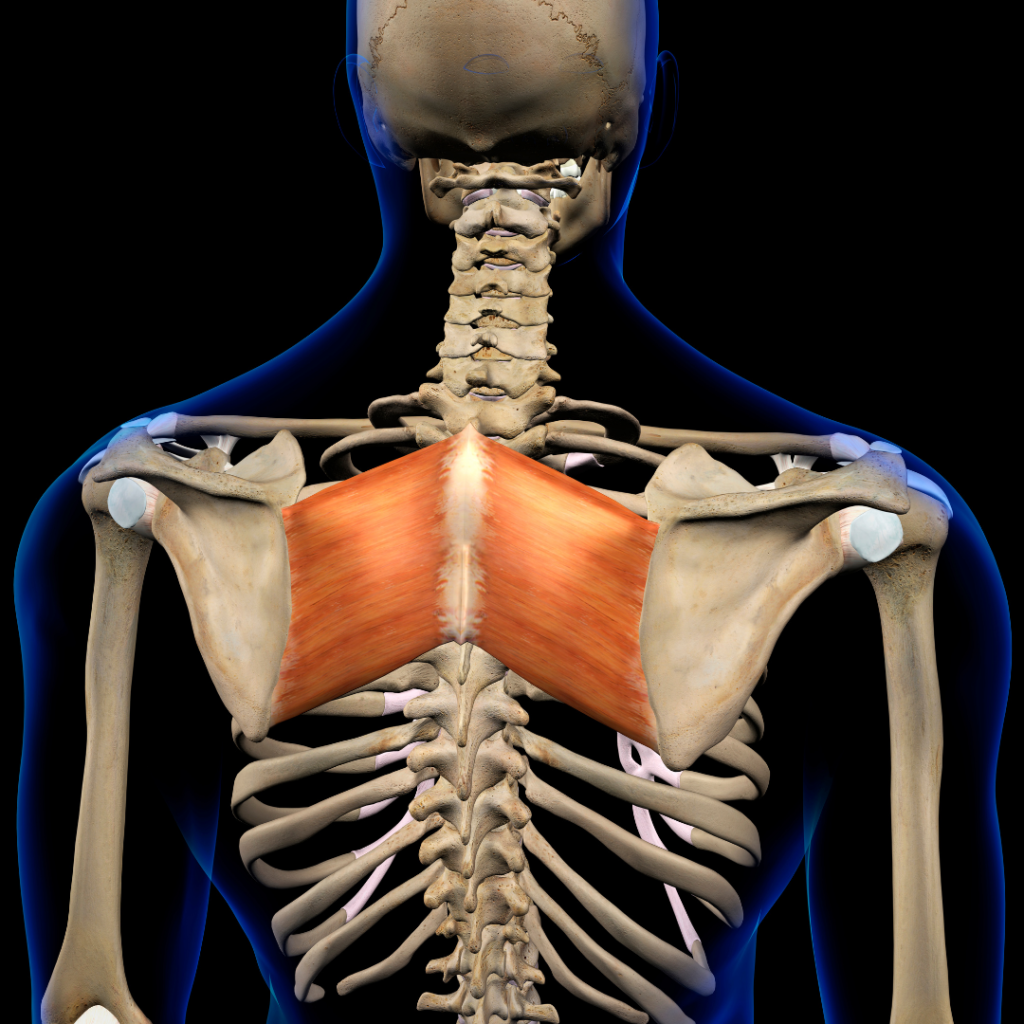

Find a tight spot in the mid back–between the shoulder blade and the spine is a great spot. Use a lacrosse ball to hold pressure on a tight area.
Don’t press the ball directly on the spine–that’s just uncomfortable. Instead, find a meaty, tender spot in the muscles of the mid back and hold pressure there.
This technique is best performed in standing, with the ball between your back and the wall. You can do it lying down, but it’s harder to control how much force you’re putting into the ball.
Standing solves this problem–lean hard into the ball if you tolerate a lot of force. Or lean gently if your muscles are super sore.
Rolling around too much is a mistake. If you want to localize pressure to one tight area, sustained pressure works best.
Mild to moderate discomfort is a good thing–it means you’re in an area of muscle tension. But more pressure isn’t always better; don’t push yourself to the point of tears.
Strength Exercises
Strengthening exercises improve how well your middle and upper back handle loading. It makes lifting, carrying and sitting in awkward positions more bearable. We’ll start with the easiest options and progress to the most challenging.
1) Bird Dogs
This popular exercise challenges the stability of the middle and lower back.
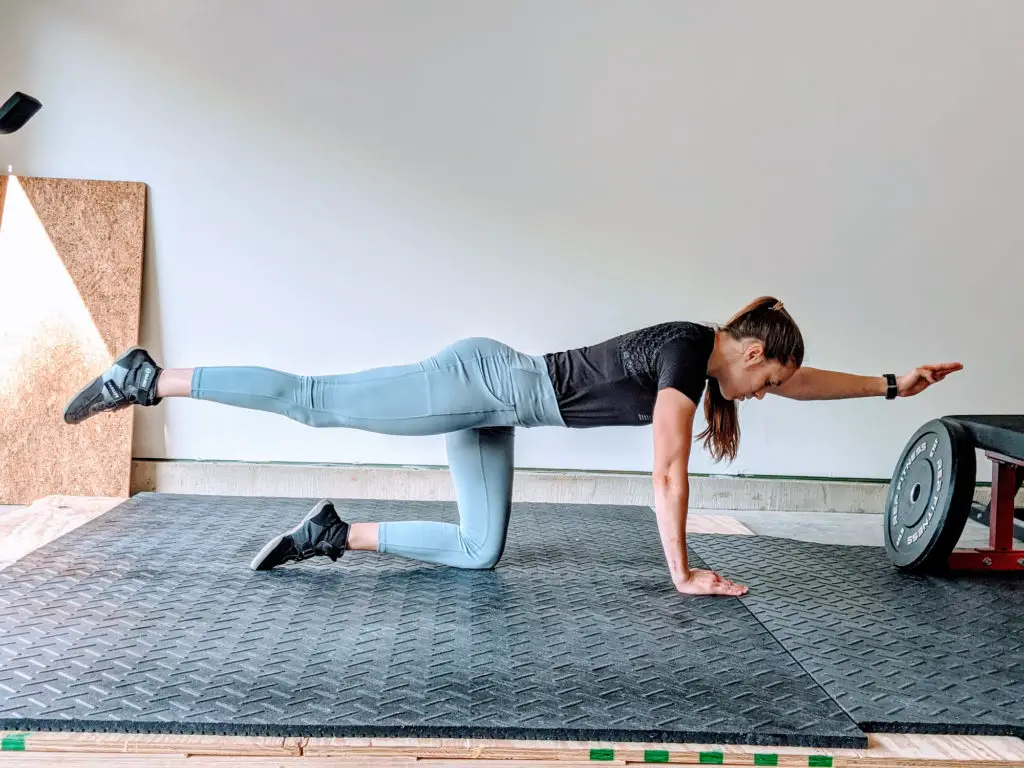
Lift one arm and the opposite leg. Keep your pelvis stable. Repeat on the other side. Perform in a controlled fashion to maximize the benefits.
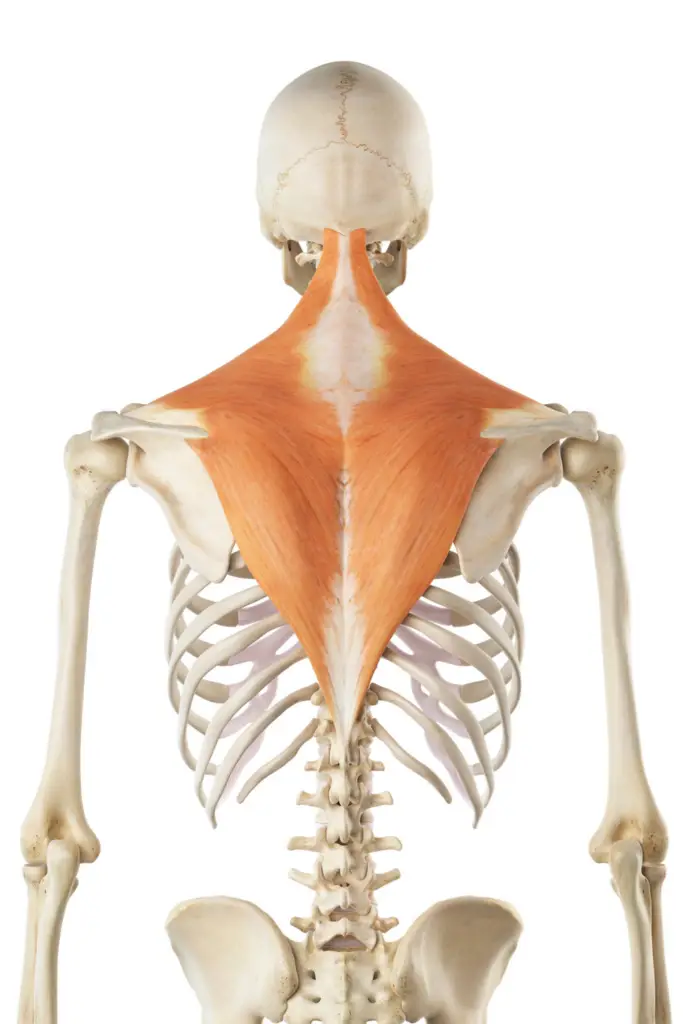
Bird dogs strengthen the muscles along the spine and the lower trapezius muscles.
2) Bilateral Band External Rotation
This exercise strengthens the rotator cuff muscles on the shoulder blade (infraspinatus, teres minor) and the muscles between the shoulder blades (rhomboids, trapezius).
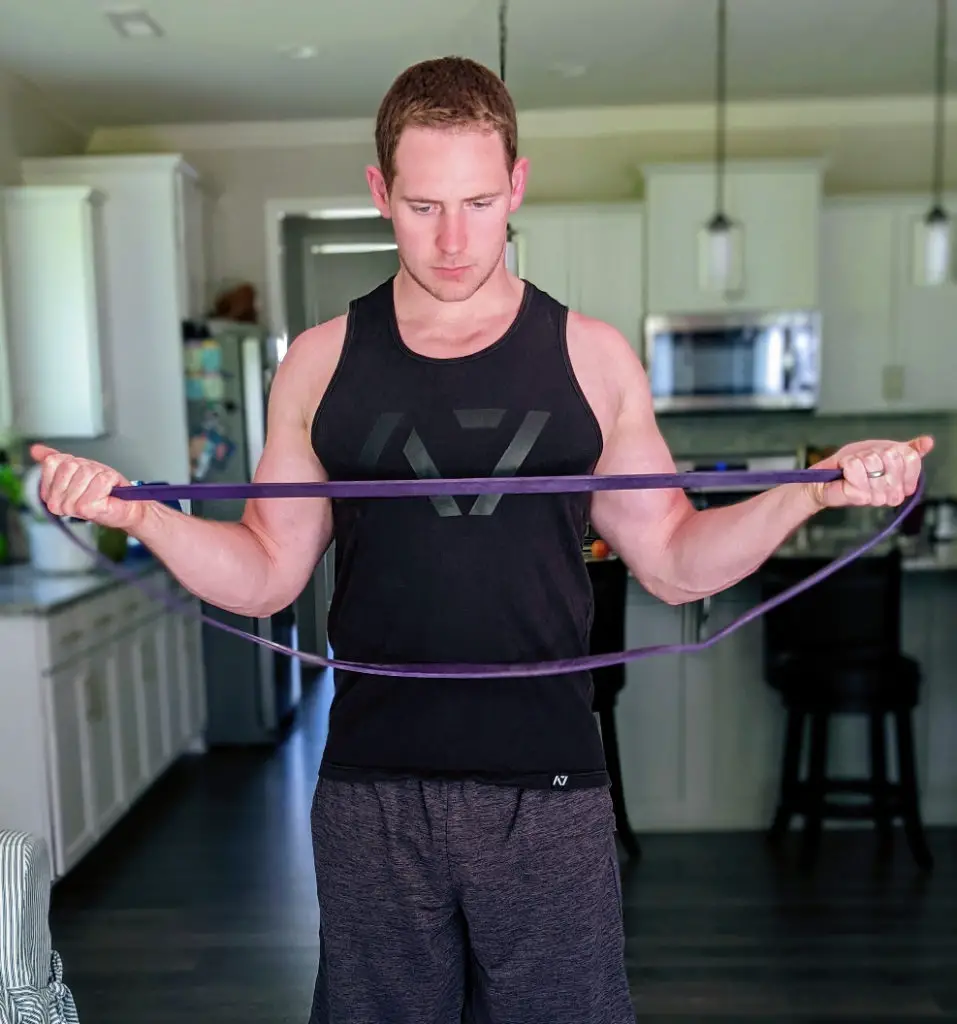
Keep the elbows pinned to the side as you gently pull the hands away from each other. A palms up position puts the shoulders in a comfortable spot. Palms down is less comfortable for the shoulders.
3) Band Pull-Aparts
This exercise targets the middle trapezius and rhomboid muscles–key muscles for a tall, shoulders-back posture.
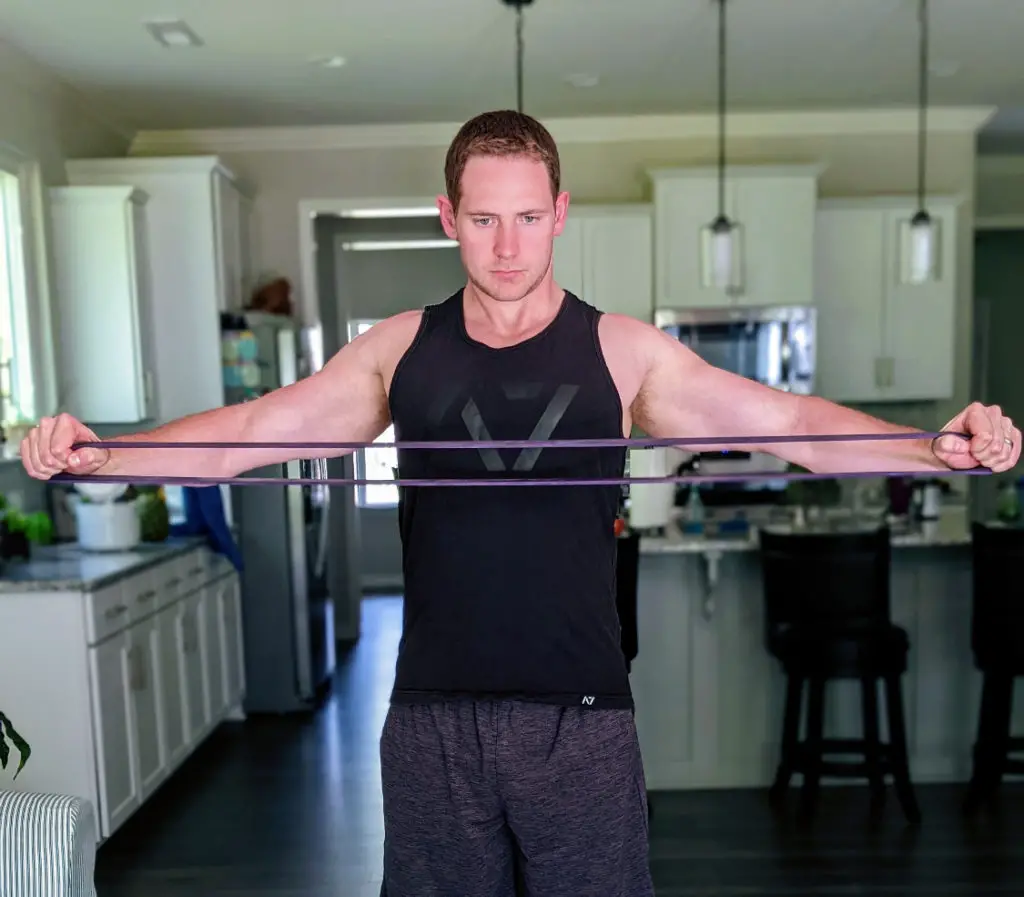
Grab a resistance band and hold with your palms down. Pull the band apart so it touches your lower chest / upper abdomen area. Squeeze the shoulder blades together and down as you pull the band apart.
Need a resistance band? Get one here.
4) Prone I’s
This simple exercise targets the lats (latissimus dorsi), rhomboids and middle trapezius muscles.
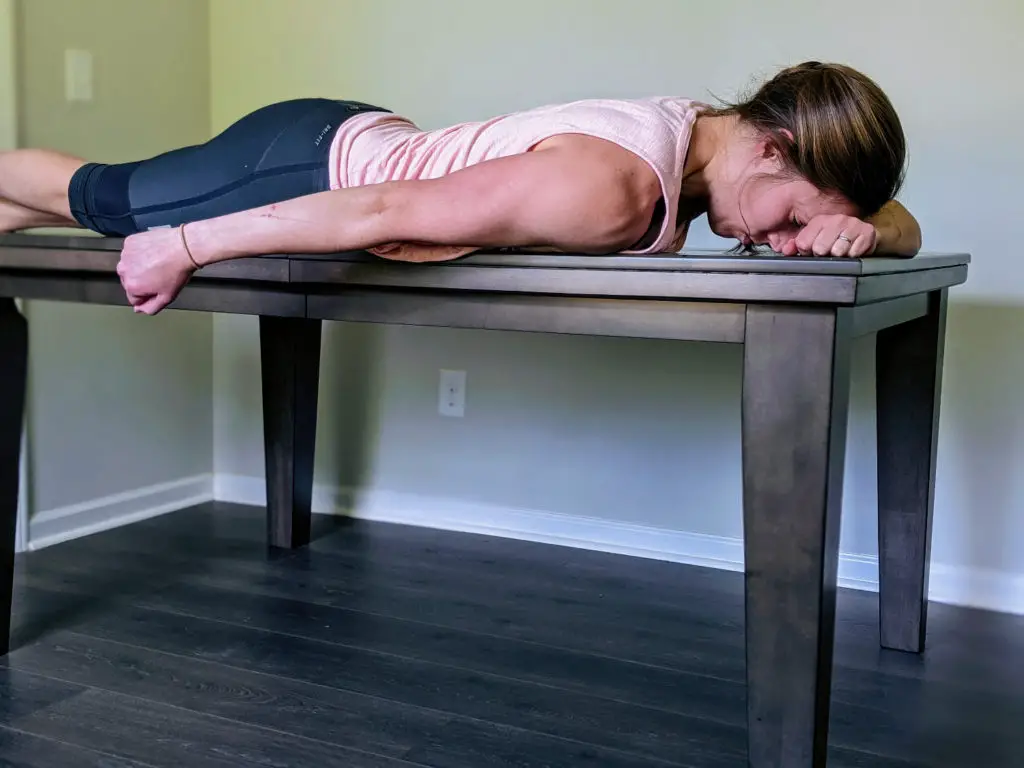
Start by lying on your stomach with your arm hanging off the table. Next, bring your hand up towards your hip. Then, slowly lower your arm back the the starting position. Repeat on both sides.
Use small weights if it feels too easy.
5) Prone T’s
Prone T’s target the middle portion of the trapezius muscle. They can be done with or without weight.
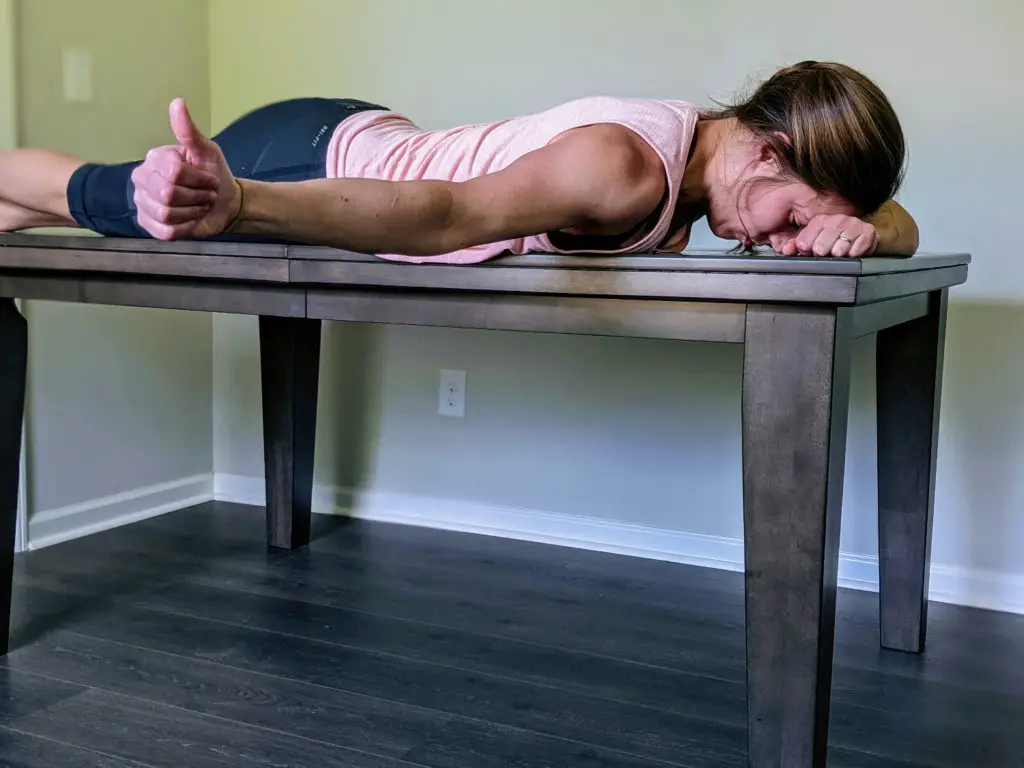
Keep the arm in a thumbs-up position. Raise and lower in a controlled fashion.
6) Prone Y’s
Perform these just like prone T’s, the only difference is the angle of motion. Prone Y’s target the lower trapezius muscle.
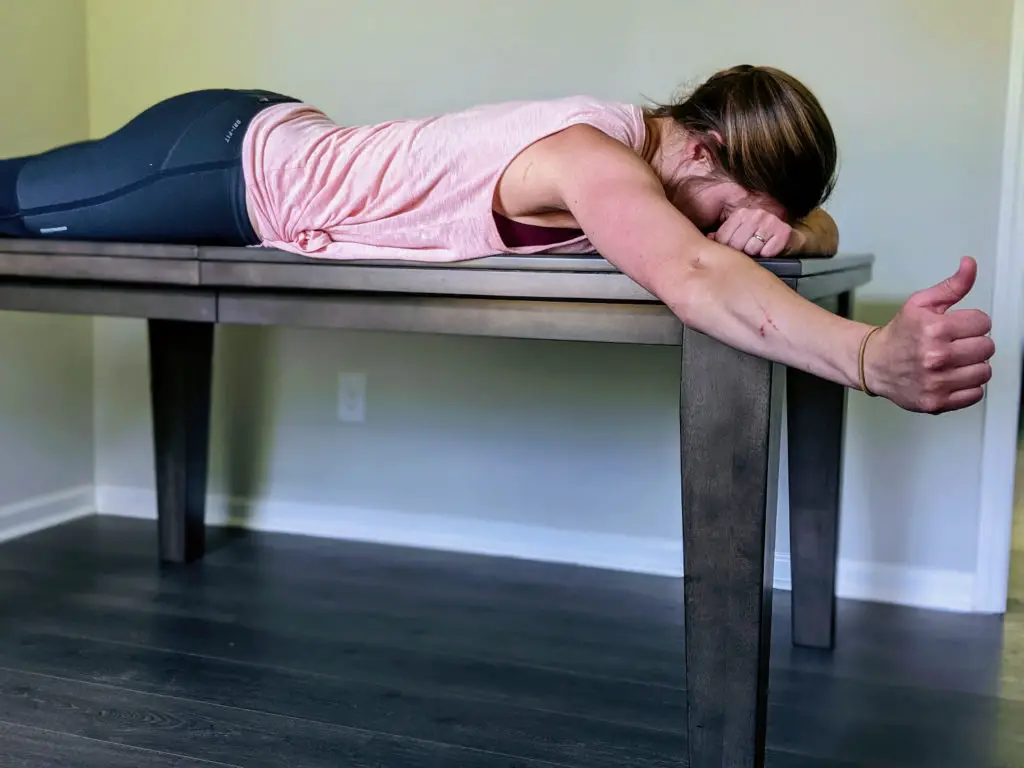
To make these tougher, grab some light weights or hold a water bottle.
7) Modified Superman’s
This equipment-free exercise is one of my favorites for patients with upper back pain. Modified Superman’s extend the upper back, which is great for people who spent a lot of time at a desk (or those with osteoporosis). It strengthens the muscles all along the spine, from the butt to the top of the neck!
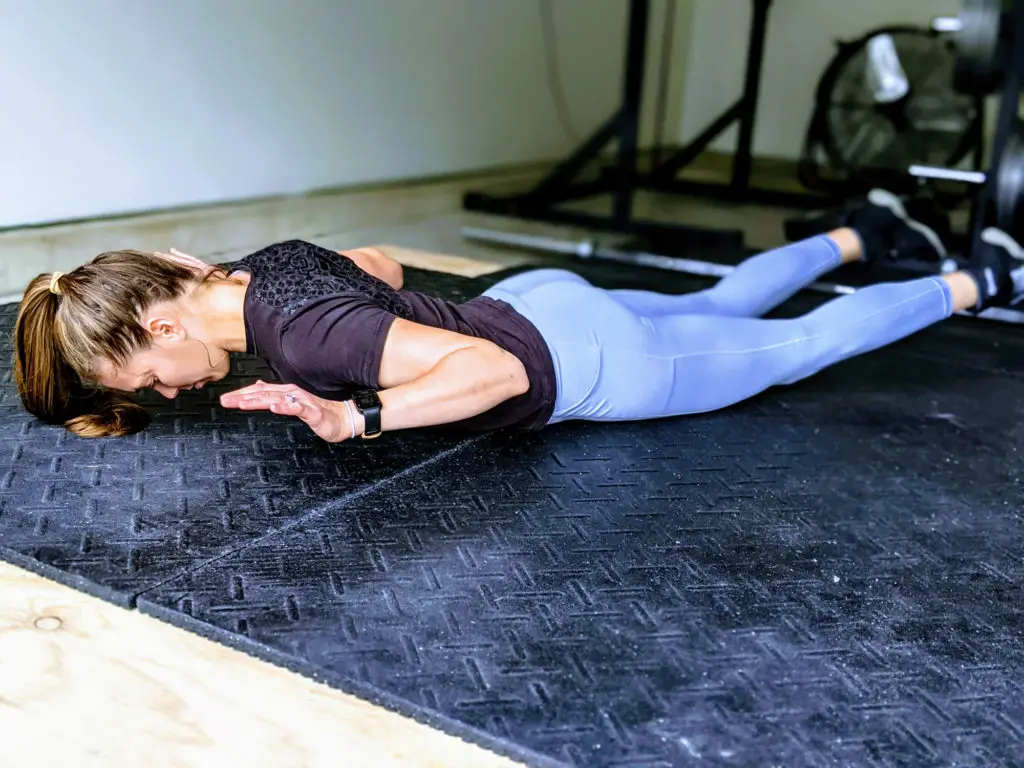
Squeeze the shoulder blades down and back as you lift the chest up off the floor. Put your arms in a “W” position. Foot position is up to you–some people like to lift the feet while others prefer to keep them on the ground. Keep the eyes on the floor to hold your neck in a neutral position.
Holding 5 to 10 seconds is a reasonable starting point. I typically prescribe a few sets of 10 to 15 repetitions.
8) Lawnmower Rows
These exercises are a great return-to-lifting option. They’re called lawnmower rows because the motion is similar to starting lawn mower. You can use a dumbbell, resistance band or weight plate.
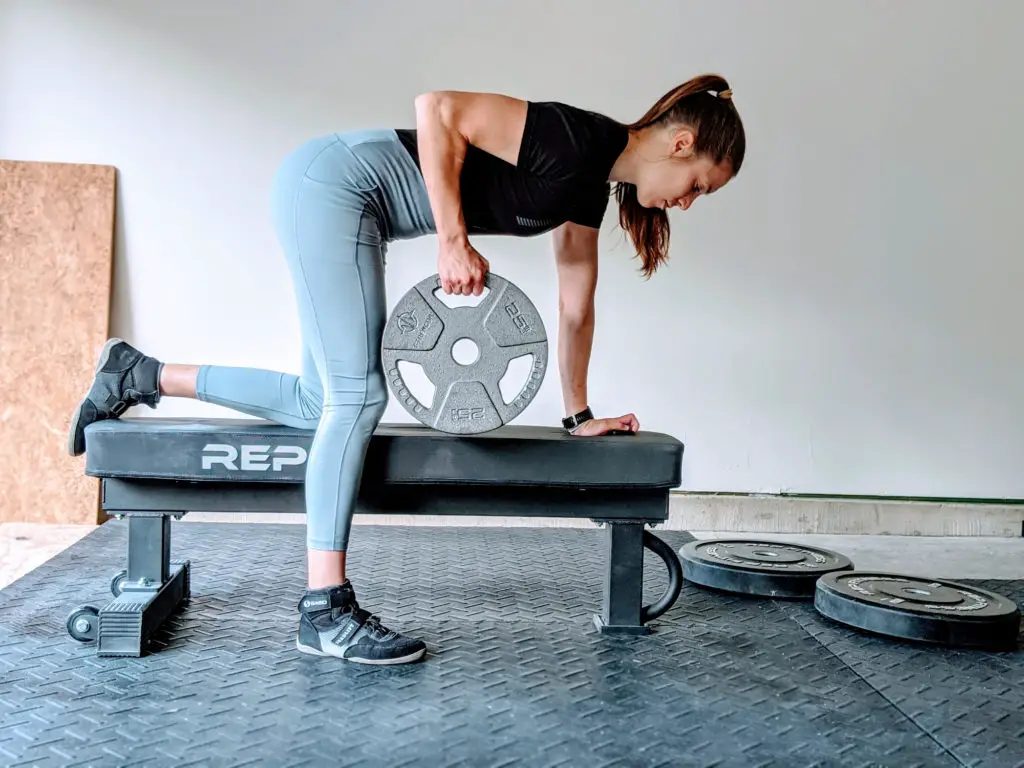
A few pointers–keep the elbow tucked into the side and move through a full range of motion to maximize the muscle-building benefits.
9) Barbell Rows
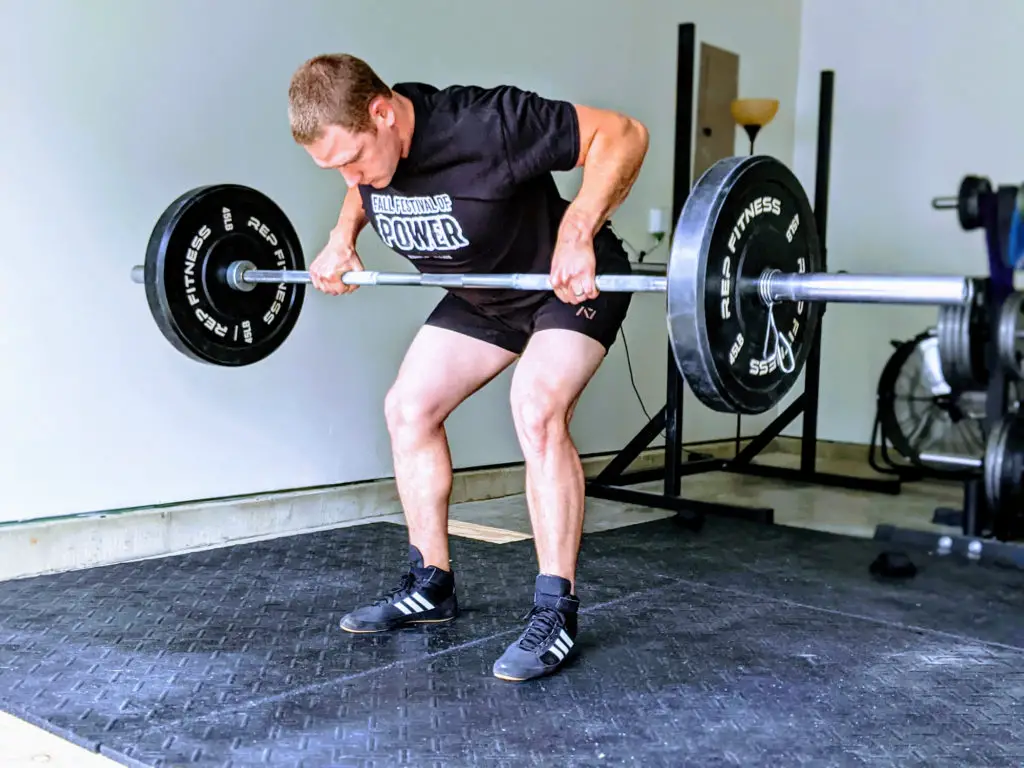
Last but not least, barbell rows are a great way to build a strong and sturdy middle back. Save these for the second half of the rehab process. Start with the bar on the floor. Pull it up to the chest before letting it descend back to the floor.
I like to let the bar rest on the floor between repetitions to let the stretch reflex dissipate and prevent me from bouncing the weights off the floor.
This exercise will help you build a middle back that can handle just about anything.
Bonus Tips
Using a posture support can reduce pain, especially if sitting or other prolonged positions aggravate your mid back. It’s not a foolproof long-term solution. But it can make a huge difference in alleviating pain and kick-starting your recovery.
Sitting with lumbar support is key if your mid back hurts when you sit for a while. This is the lumbar roll I’ve used for 2 years. It’s comfortable, durable and keeps me a good position when I work on the computer.
If sitting hurts your back, read this article to learn 5 Ways to Sit with Less Pain
Dealing with low back pain, too? Check out 3 Powerful Treatments for Low Back Pain
Readers: What’s your favorite exercise for mid back pain? Let me know in the comments!
For more pain relief insights, join the free Facts & Physio Newsletter. Plus, get The Recovery Checklist when you sign up.
